Uncategorized

Polish Concrete Floors

Everything You Need to Know About How to Polish Concrete Floors

Polished concrete floors are quickly becoming popular for homes and businesses. Their sleek, modern appearance and low maintenance make them a go-to flooring solution. If you want to upgrade your space, polished concrete offers style, durability, and a cost-effective solution. It’s a versatile option, taking over due to its beauty and functionality. What sets polished concrete apart is its ability to transform dull, plain concrete into something elegant. The process is simple but requires attention to detail and the right tools. Suppose you’re curious about how to get that perfect polished concrete floor. In that case, this guide will take you through the entire process, from preparation to polishing. Whether you’re working on an existing floor or starting fresh, polished concrete offers a flooring solution that’s both eco-friendly and practical. What is Polished Concrete? Polished concrete refers to a concrete surface being ground, honed, and polished using specialized equipment and diamond abrasives. The process starts by removing the top layer of concrete and exposing the aggregates underneath. Once exposed, these aggregates are smoothed and polished to create a glossy, reflective finish. Many people choose polished concrete not only because it looks great but because it’s highly durable and requires minimal upkeep. The finish resists stains, abrasions, and wear, perfect for high-traffic areas. It’s also an affordable option in the long run because it doesn’t require constant maintenance. Polished concrete is suitable for large and open spaces in homes, offices, and industrial properties alike. Benefits of Polished Concrete Floors Before discussing how to polish your own floors, let’s explore some of the reasons why people are falling for polished concrete. Durability Polished concrete floors are incredibly tough. Concrete is naturally durable, but it becomes even more resilient when polished. These floors withstand heavy foot traffic, making them ideal for kitchens, warehouses, offices, or retail spaces. Polished concrete is also resistant to cracks, stains, and abrasions, so it’s built to last. Even spills or heavy use won’t damage the surface easily. Low Maintenance One reason people are falling in love with polished concrete is its maintenance. Its smooth surface makes cleaning a breeze. Dirt or grime won’t settle in cracks like tile grout or carpet fibers. A simple mop is often needed to keep the floor spotless. Polished concrete doesn’t require frequent waxing or resealing, which can be time-consuming and costly for other floor types. Aesthetic Appeal The glossy finish of polished concrete can dramatically improve the look of any room. The shine helps reflect light, making even small spaces feel bigger and brighter. Polished concrete is versatile, whether you want a mirror-like finish or a more subtle matte look. You can also get creative by adding stains or dyes to create unique patterns or colors, adding a personal touch to the space. Versatility in Design Polished concrete is highly customizable. You can choose the look that best fits your space, from traditional gray concrete to more decorative options. The polishing process reveals the natural aggregates in the concrete, which can give a terrazzo-like appearance. Plus, you can add different stains or coatings to create colors and designs that complement the rest of your interior. The endless options make it easy to match any style or theme. Slip Resistance While polished concrete is smooth and shiny, it doesn’t mean it’s slippery. The surface can be treated to ensure enough traction, especially in high-traffic or wet areas like kitchens and bathrooms. Anti-slip treatments are also available to increase safety, ensuring that polished concrete is practical and stylish. Step-by-Step Guide to Polishing Concrete Floors Polishing concrete may seem daunting initially, but it’s a manageable process with the proper steps. Here’s a detailed guide to help you through the polishing process: 1. Surface Preparation This step is essential to ensuring the final result is flawless. Clean the Concrete: Remove any dirt, adhesives, or existing coatings to ensure the surface is clean and ready for grinding. Repair Cracks and Holes: Any cracks or holes should be filled with epoxy or a semi-rigid filler. This helps create a smooth, even surface. Seal Expansion Joints: Sealing any expansion joints prevents uneven surfaces when grinding and polishing. Test Concrete Hardness: Concrete’s hardness can vary, so testing helps determine which grinding discs and techniques work best. 2. Grinding Grinding is where you start to see the transformation. Coarse Grit: Begin with a 30- or 40-grit diamond to remove surface imperfections and start leveling the concrete. Progress to Finer Grits: Gradually increase the grit size (e.g., 80, 150) to remove scratches and smooth the surface. Use 150-Grit or Finer: This step smoothens any remaining rough patches, refining the surface for polishing. Grouting (if needed): If noticeable gaps exist, apply a grout to fill them in for an even finish. 3. Polishing Polishing is responsible for the shine and smoothness of your concrete. Apply a Densifier: Densifiers are chemicals that penetrate the concrete, making the surface denser and more durable. Start with 100- or 200-grit Resin: This begins polishing, removing rough textures left behind by grinding. Use Finer Grits: Move up to 400, 800, 1500, and even 3000 grits to refine the finish and achieve the level of gloss you desire. Buff the Surface: After attaining the desired shine, use a buffer to smooth out any final rough spots and enhance the shine. Optional Stain Guard: Apply a protective coating to keep the surface looking new and make cleaning easier. 4. Finishing Touches Once the polishing process is complete, it’s time to perfect your floor. Remove Dust: Vacuum any dust or debris left behind during the grinding and polishing stages. Buff the Floor Again: A final buff will smooth out imperfections and enhance the finish. Optional Sealing: Apply a sealer for additional protection and to enhance the shine, especially in high-traffic areas. 5. Optional Staining You can personalize your polished concrete floor with colors or patterns. Concrete Stains: Concrete stains are available in various colors, allowing you to add depth and creativity to your polished concrete. Whether you want a uniform

Everything You Need to Know About How to Polish Concrete Floors Read More »

Metallic Epoxy Floors

Why Choose Metallic Epoxy Floors? Key Advantages Explained

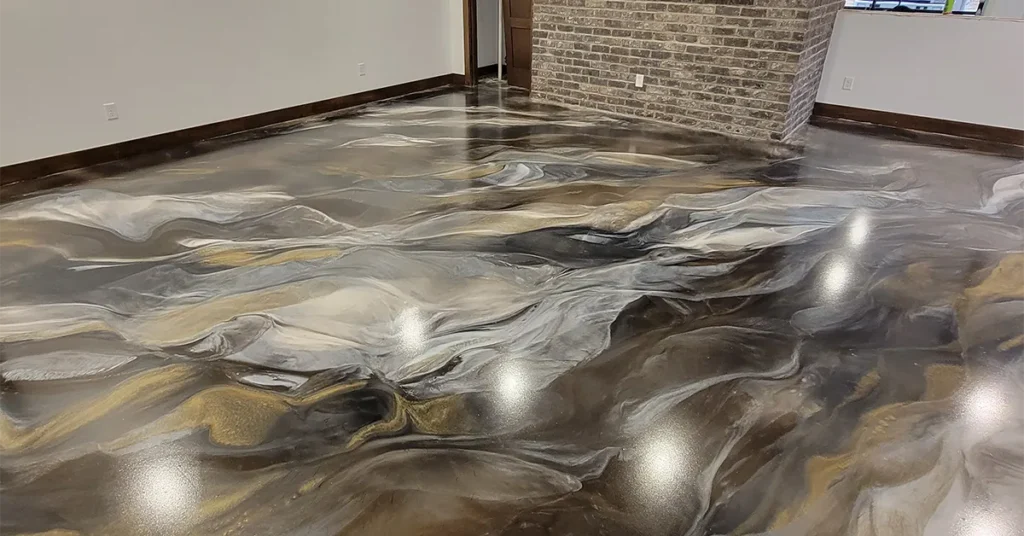
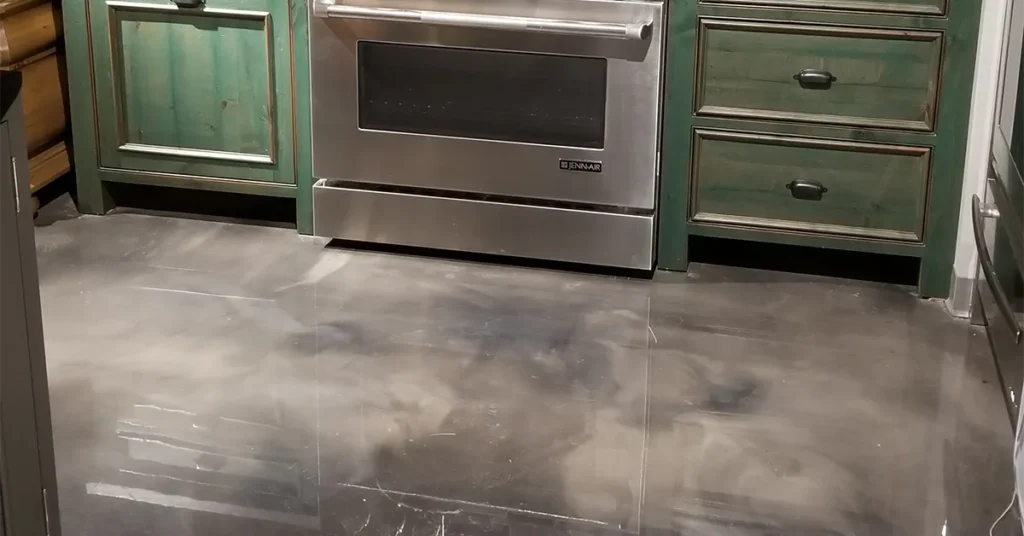
There are plenty of options when picking out flooring for your home or business. But if you’re looking for something that looks great, lasts long, and stands out, metallic epoxy floors are worth serious thought. These floors have a deep, artistic finish that grabs attention. They’re also durable, making them great for homes and commercial spaces. This guide explains metallic epoxy floors, why they’re so popular, and what you should know before installing one. What Are Metallic Epoxy Floors? Metallic epoxy floors are a special kind of flooring made by mixing epoxy resin with metallic pigments. Once applied, the surface creates a smooth and artistic look that can mimic marble, granite, or even water. It’s poured over concrete and hardens into a solid, one-piece floor. These floors are known for their one-of-a-kind appearance. Each pour comes out differently. They’re used in kitchens, garages, bathrooms, showrooms, retail spaces,  and anywhere you want the floor to hold up and look impressive. Types of Finish: Gloss, Semi-Gloss, and Matte Metallic epoxy floors can be finished in three ways: gloss, semi-gloss, or matte. Glossy floors are the shiniest and reflect the most light. But they’re also the easiest to scratch. Drag a chair or drop a tool, and you’ll probably see a mark. If the space has very light foot traffic and you care more about looks, gloss might work. Matte finishes are the most scratch-resistant. They don’t shine as much, but they’re tougher. If the space sees a lot of movement or you need more durability, matte is your best option. Semi-gloss sits in the middle. High-wear urethane topcoats are strongly recommended in busy areas. They add another layer of protection, especially where people walk around often or where furniture moves. Think about how you’ll use the space. Will it be walked on a few times a week? Then gloss or semi-gloss may be fine. But if it’s a garage, workshop, or store with lots of traffic, go with a matter or high-wear urethane top coat. Key Advantages of Metallic Epoxy Floors Now that we have a basic understanding of what metallic epoxy floors are, let’s dive into the reasons why they’re so popular. Here are the key advantages that make metallic epoxy flooring a standout choice for homes and businesses alike: 1. Unmatched Aesthetic Appeal Metallic epoxy floors are one of a kind. The color effects, shimmer, and fluid motion turn an ordinary floor into something high-end and modern. Each floor is one-of-a-kind with its own blend of tones and flow. Whether it’s a soft pearl look or a unique color combination and pattern, these floors bring a strong visual impact to any room. They fit well in homes, showrooms, and trendy commercial spaces. People choose them because they want something different that stands out and leaves an impression. 2. Durability and Longevity These floors are known for durability. Epoxy resin is hard and doesn’t wear out easily. It resists stains, moisture, and most chemicals. Glossy finishes can show wear faster if not handled carefully, especially in busy spaces. Matte finishes, on the other hand, hold up better against scratches and scuffs, making them a better fit for high-traffic areas. Choosing the right topcoat based on your usage will keep the floor looking great for years. 3. Low Maintenance and Easy Cleaning Metallic epoxy floors are easy to clean and simple to maintain. They have no grout lines, seams, or fibers, so dirt and dust don’t get trapped. You can sweep with a soft broom or use a mop to remove spills without much effort. The surface resists stains, and most liquids just sit on top until you wipe them off. This makes the floor great for homes, garages, and places where cleaning needs to be quick and easy. People like it because it saves time and always looks neat with minimal effort. 4. Seamless and Hygienic Surface Because the floor is poured, it forms one complete surface with no cracks or joints. This helps keep bacteria, moisture, and debris from getting trapped. Kitchens, bathrooms, and healthcare spaces benefit from that clean finish. It’s easier to sanitize and holds up better in places where hygiene matters. The seamless nature also gives a modern and sleek look, which adds to the design appeal while offering real health and safety benefits for residential and professional settings. 5. Customizable Design Options You can fully design your metallic epoxy floor with colors, pigments, and application techniques. Whether you want a marble look, a swirling galaxy pattern, or something that matches your brand, it can be done. But it’s important to know that the final result won’t be exactly as planned. Epoxy flows and moves during drying, so the final look depends on how it settles. Even though it’s unpredictable, that’s what makes each floor unique and artistic. You get something truly personal and eye-catching. 6. Cost-Effective in the Long Run Metallic epoxy flooring delivers excellent long-term value, even with its higher initial cost. While options like vinyl or carpet need regular replacement, these durable floors have looked new for years, with simple cleaning and no expensive treatments required. You can save plenty of money by cutting maintenance costs and benefit from better light reflection that can lower electricity usage. Consider This Before You Decide While metallic epoxy floors have many strengths, it’s only fair to understand the challenges that may come with them: Glossy finishes can scratch easily. Chairs, tools, and even small debris can leave marks. Matte is stronger, but it doesn’t shine. It works best in areas that get used often. If your space sees heavy use and you don’t want to deal with marks, go with matte and a high-wear topcoat. Comet trails are almost guaranteed. These are little streaks or swirls that show up as the epoxy settles. They happen from dust, debris, or pigment mixing. Even in the cleanest space, they can’t be fully avoided. You won’t have full control over the final design. Epoxy keeps moving up to 10

Why Choose Metallic Epoxy Floors? Key Advantages Explained Read More »

Commercial floors

Floor Coving Uses in Residential and Commercial Interiors

When you walk into a clean kitchen or a neat hospital hallway, you probably notice the bright lights or the shiny floor. But there is one thing many people do not notice right away. It is a small detail that helps keep these spaces clean and safe. That detail is floor coving. Floor coving is the curved edge where the floor meets the wall. Instead of a sharp corner, it creates a smooth and rounded surface. It may not seem like a big deal, but this simple feature makes a huge difference in both homes and businesses. In this guide, you will learn why floor coving matters, where it is used, and how it helps people every day. What Is Floor Coving? Floor coving is the curved part between the floor and the wall. Instead of a sharp corner where the floor meets the wall, coving gives it a smooth curve. It looks neat and makes cleaning easier. It is made from vinyl, rubber, epoxy, or tile. Some types are soft and bend easily. Others are hard and strong. People use floor coving in homes, stores, schools, kitchens, and more. Why Do People Use Floor Coving? It Keeps Things Clean Corners are hard to clean. Dust and dirt build up and stay hidden. Coving makes the corners smooth, so you can clean them better. Mops and vacuums can reach every part of the floor without missing anything. This is super helpful in places where cleaning is important, like kitchens, hospitals, and bathrooms. It Stops Water from Leaking In rooms where water is used frequently, water can get into cracks, causing mold, damage, or bad smells. Floor coving stops this by sealing the space between the wall and the floor. That is why people like using it in bathrooms, laundry rooms, and basements. It Makes Rooms Look Nicer Coving gives rooms a finished look. It connects the floor and wall smoothly and cleanly. It works well in both homes and workspaces. Even in a garage, coving makes the room look more organized. It Protects Walls and Floors In busy places, walls often get bumped by carts, chairs, or cleaning tools. Floor coving helps protect the lower part of the wall from scratches and dents. It also protects the edges of the floor from damage. Floor Coving in Residential Spaces Many people do not realize that floor coving can be a great feature in their homes. It adds value, makes cleaning easier, and helps prevent long-term damage. 1. Bathrooms Bathrooms are full of water, steam, and soap. When water spills or leaks, it can seep into the small cracks where the wall and floor meet. Over time, this can cause mold, bad smells, and damage to the wall. Floor coving helps block that water from reaching the wall. It makes the room easier to clean and healthier to use every day. 2. Kitchens Home kitchens can get messy. Oil splashes, food spills, and water drips happen all the time. Floor coving makes it easier to clean those messes. It also helps stop crumbs, liquids, or dirt from building up in the corners. That means a cleaner kitchen and less work for you. 3. Laundry Rooms In many homes, the laundry room is where leaks happen. Whether it is a loose hose or a full washing machine, water can be a problem. Floor coving gives your walls a bit of extra protection and helps contain water before it spreads. 4. Basements Basements are often damp or musty. Floor coving helps protect the walls in case of a leak or small flood. It also helps with cleaning, especially if you use your basement for storage or as a workshop. 5. Garages A lot goes on in garages. You park your car, store tools, and maybe even do DIY projects. Floor coving adds a clean finish to the space and protects the walls from oil stains, muddy shoes, or bumps from bikes and boxes. Why Homeowners Opt For Floor Coving It gives the room a clean and finished look It stops water and dirt from getting into tight corners It makes cleaning faster and easier It helps protect your home from damage It can raise the value of your house Homeowners who add coving to the right areas often find they spend less time cleaning and less money fixing problems later. Floor Coving in Commercial Spaces In businesses, floor coving is not just a smart idea. In many places, it is a requirement. Restaurants, hospitals, and factories need clean and safe floors. Floor coving helps meet health codes, protect property, and keep workers and customers safe. 1. Commercial Kitchens Health departments usually require floor coving in kitchens. Why? Because sharp floor-to-wall corners are hard to clean. Food, grease, and bacteria love to hide in tight spots. Coving makes it easier for cleaning crews to do their jobs and helps kitchens stay up to code. Coving also protects the lower walls from being damaged by mop buckets, carts, or foot traffic. 2. Restaurants and Cafes Even outside the kitchen, floor coving helps in dining areas and service zones. It adds a polished look to the space and makes daily cleaning quicker. Plus, it gives restaurant owners peace of mind knowing that food and liquids will not sit unnoticed in the corners. 3. Hospitals and Clinics Cleanliness is everything in healthcare. Germs and dirt must be removed quickly and thoroughly. Floor coving helps staff clean the edges of rooms without missing a spot. That makes the space safer for patients and easier for the cleaning team to maintain. It also keeps walls safe from rolling carts, hospital beds, and wheelchairs that move through hallways all day long. 4. Daycares and Schools In places where kids play, eat, and learn, spills and messes are part of the routine. Floor coving helps prevent dirt, liquids, and even small toys from hiding in corners. It also protects walls from crayons, toys, and furniture bumps. Parents and staff love it

Floor Coving Uses in Residential and Commercial Interiors Read More »

Epoxy Flooring

Residential Epoxy Flooring: Benefits, Installation, and Cost Breakdown

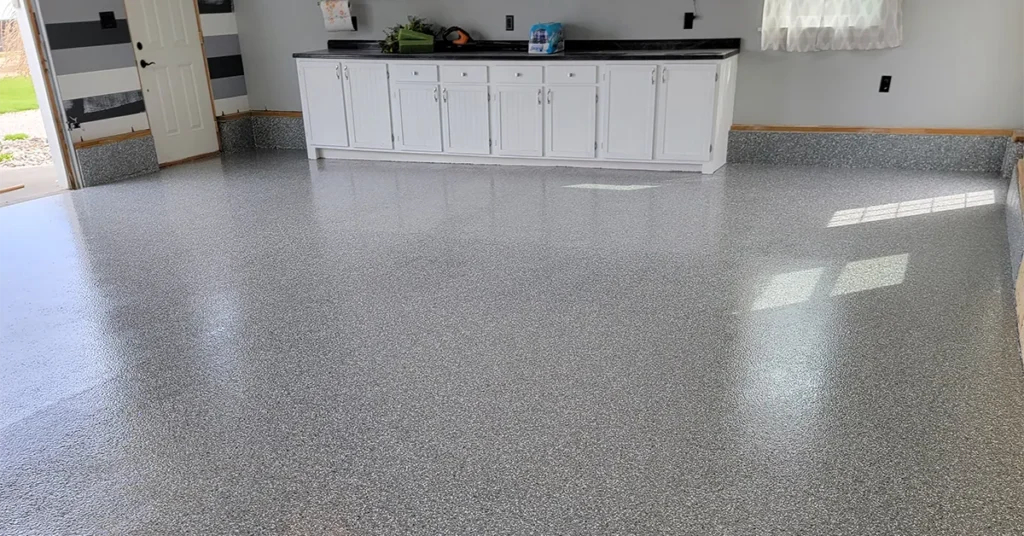
Are you tired of dull, cracked, or stained floors in your home? Residential epoxy flooring might be the perfect solution! This durable, stylish, and easy-to-maintain flooring option is gaining popularity among homeowners. Unlike traditional flooring, epoxy coatings create a seamless, high-gloss finish that resists damage from daily wear and tear. Whether you’re upgrading your garage, basement, or even your kitchen, epoxy flooring offers a modern look with unbeatable durability. In this guide, we’ll explore the benefits of residential epoxy flooring, how it’s installed, and a detailed residential epoxy flooring cost breakdown. By the end, you’ll know if epoxy flooring is the right choice for your home! Why Choose Residential Epoxy Flooring? Residential epoxy flooring is a special coating made from resin and hardeners that chemically bond to concrete, creating a rock-solid surface. Homeowners love it because it transforms old, worn-out floors into sleek, high-performance surfaces. Unlike tile or hardwood, epoxy doesn’t crack or warp over time, making it ideal for high-traffic areas. It’s also resistant to oil, chemicals, and moisture, which is why it’s a top pick for garages and basements. Plus, with endless customization options, you can choose colors, patterns, and textures to match your home’s style. Let’s dive deeper into the key benefits: Super Strong & Long-Lasting Epoxy floors are incredibly tough, resisting scratches, dents, and heavy impacts from dropped tools or furniture. Unlike vinyl or laminate, which can peel or fade, epoxy maintains its shine for years. It’s also resistant to UV rays, so it won’t yellow in sunlit rooms. Many epoxy floors last 15-30 years with proper care, making them a smart long-term investment. Easy to Clean & Maintain Spills and stains wipe right off since epoxy is non-porous. No more scrubbing grout lines like with tile! A simple mop or damp cloth is all you need for daily cleaning. Unlike carpet, it won’t trap dust or allergens, making it great for allergy sufferers. For tougher stains, mild soap and water do the trick without damaging the surface. Safe & Slip-Resistant Wet floors can be dangerous, but many epoxy coatings include anti-slip additives for better traction. This makes them safer for kids, pets, and elderly family members. Some even meet commercial-grade slip resistance standards, perfect for laundry rooms or entryways. Endless Design Options Want a glossy, mirror-like finish? Or maybe a speckled “flaked” look? Epoxy can be customized with metallic pigments, colored chips, or even 3D effects. You can match your home’s décor or create a bold statement floor. Some homeowners even add logos or patterns for a unique touch! Cost-Effective in the Long Run While the upfront residential epoxy flooring cost may be higher than paint or vinyl, its durability means fewer repairs. You won’t need to replace cracked tiles or refinish scratched wood. Epoxy stays looking new with minimal upkeep. Over time, this saves money on maintenance and replacements. How Is Residential Epoxy Flooring Installed? Installing epoxy flooring is a multi-step process that requires precision. While some DIYers attempt it, only professionals ensure the best results. Here’s a detailed breakdown of each step: Step 1 – Profile & Grind Our team of experts meticulously preps your floor using our commercial-grade, hardness-specific diamond grinders. Our vacuum systems minimize dust to maintain a clean working environment. Step 2 – Repair & Prepare We use 100% solids to patch any cracks, joints, or pitted areas of your concrete, creating a perfectly smooth surface for our base coat application. Step 3 – Basecoat Application Once your surface is fully prepped, we apply our Industrial-Grade self-priming basecoat, which completely soaks into and adheres to your concrete slab. Step 4 – Full Flake Broadcast Flakes of your color choice are generously hand-broadcast for an even, colorful, and robust surface. The flakes are then rolled into the base coat to ensure evenness and maximum adhesion. Step 5 – Excess Flake Removal Once sufficiently cured, all loose and excess flakes are scraped away from your surface, followed by complete removal with our commercial-grade blowers and vacuums. Step 6 – Topcoat Application Once the above steps are complete, your coating is finalized by an even application of our 100% UV-stable, Industrial-Grade topcoat. Residential Epoxy Flooring Cost: What to Expect The residential epoxy flooring cost varies based on materials, labor, and design complexity. Here’s a closer look at what influences pricing: If you’re hiring a professional, labor will be a significant part of the cost. However, you get the benefit of expert installation, which often includes a warranty. If you go the DIY route, you’ll save on labor, but you’ll need to invest time, tools, and energy to get it right. Factors Affecting Cost Floor Size – Larger areas cost more but may have lower per-square-foot rates. Floor Condition – Cracked or uneven concrete requires extra prep work, increasing labor costs. Epoxy Type – Basic single-coat epoxy is cheaper than multi-layer decorative systems. Labor Costs – Professional installation ensures quality but adds to the total price. Location – Prices vary by region due to material availability and labor rates. DIY vs. Professional Epoxy Flooring Installation: Which Is Right for You? Deciding between DIY and professional installation for your residential epoxy flooring depends on your budget, skill level, and project expectations. Below, we break down the pros and cons of each approach to help you make the best choice. Pros of DIY Epoxy Flooring Cost Savings – If you do it yourself, you can save on labor costs. Professional installation can double or triple your total expense, while DIY materials may cost less, however, the results with DIY might not be what you hope for. Satisfaction & Customization – Applying epoxy yourself can be rewarding if you enjoy hands-on projects. You have full control over colors, patterns, and finishes, allowing for a truly personalized look. Flexible Timeline – Unlike contractors who work on a schedule, DIY lets you complete the project at your own pace. However, keep in mind that epoxy has a limited pot life (working time) once mixed, so you must work

Residential Epoxy Flooring: Benefits, Installation, and Cost Breakdown Read More »

Garage Floor Coating

Protect & Enhance: The Best Garage Floor Coating Options for a Lasting Finish

Is your garage floor looking a little rough these days? Maybe it’s cracked, stained, or just doesn’t have that clean, polished look anymore. The good news is that you don’t need to live with it. A garage floor coating can transform your space, making it stronger, cleaner, and better-looking. Whether you park your car, store tools and bikes, or even use the garage as a gym or hangout spot, the right coating adds both protection and style. In this guide, we’ll walk you through the best types of garage floor coatings, how to choose the best fit for you, and how they’re installed. By the end, you’ll have everything you need to pick the perfect option for your space. Why Should You Coat Your Garage Floor? Concrete is tough, but it’s not perfect. Over time, it can crack, stain, and wear down. Water, oil, dirt, and heavy use all take their toll. A floor coating acts like armor for your garage. It protects the surface and keeps it looking fresh and clean. One of the biggest benefits of a coated garage floor is durability. With the right coating, your floor can handle heavy vehicles, tools being dropped, and even chemical spills. These coatings also make cleaning incredibly easy. You can wipe up oil or other messes with a cloth instead of spending hours scrubbing. The Best Garage Floor Coating Options When it comes to concrete coatings, choosing the right system is key. The most popular systems you find in the market are: Epoxy Polyaspartic Polyurea All coatings have their pros and cons, but the right combination of base coat and top coat is critical for long-term performance, durability, and appearance. Whether you’re coating a garage, a patio, or a commercial space, understanding the differences between epoxy, polyurea, and polyaspartic systems will help you make the most informed decision for your environment and usage. While all three materials are incredibly strong and commonly used in the industry, each one performs differently depending on factors like sunlight exposure, temperature fluctuation, and surface conditions. Let’s break down how each one works best — and where. The Role of the Base Coat The base coat is the foundation of any concrete coating system. Its primary function is to adhere to the concrete surface and provide a strong anchor for the rest of the system. All three coating types, epoxy, polyurea, and polyaspartic, can be used as base coats, but they behave very differently once applied. Epoxy is often considered the best base coat when maximum adhesion is the goal. Because it cures more slowly, it has more time to penetrate into the concrete pores, creating a deep, lasting bond. This makes it an ideal choice for indoor spaces or shaded areas where sunlight is not a concern. However, epoxy has a well-known drawback: it tends to turn yellow and amber quickly when exposed to direct sunlight. Polyurea is known for its flexibility and durability in cold climates. In environments where temperatures drop below freezing and the concrete frequently expands and contracts, polyurea outperforms other options. While it doesn’t bond as deeply as epoxy, it provides excellent resilience and won’t crack under thermal stress. It does yellow over time, but more slowly than epoxy. Polyaspartic, on the other hand, is the go-to solution for outdoor or sun-exposed areas. It has the highest UV resistance of the three and holds up the best over time under direct sunlight. However, it cures extremely fast, which limits the time it has to soak into the concrete. That tradeoff means it doesn’t bond quite as strongly as epoxy, but in situations where sunlight protection is the priority, that’s usually a worthy compromise. The Importance of the Top Coat While the base coat handles adhesion, the top coat is your protection layer. This is what shields the system from scratches, UV rays, weather damage, and foot or vehicle traffic. In nearly all professional-grade applications, polyaspartic is the preferred top coat. Polyaspartic finishes are extremely scratch-resistant, resist yellowing from sun exposure, and hold up beautifully even in high-traffic areas. Whether the base is epoxy, polyurea, or polyaspartic itself, applying a polyaspartic top coat creates a clean, durable, and long-lasting finish that protects the integrity of the system. Matching the Right System to the Environment Here’s how to think about it: your environment determines your base, and your desired durability determines your top. In cool, shaded, or indoor areas, epoxy is usually your best base option because of its unmatched bond with the concrete. In cold climates where freezing and thawing cycles are common, polyurea is the best choice thanks to its flexibility and resistance to cracking. And in sun-exposed outdoor environments, polyaspartic is the most UV-stable material and is usually preferred as both the base and the top coat — especially when aesthetics and sunlight durability are priorities. How Are Garage Floor Coatings Installed? Putting a coating on your floor takes some work, but it’s worth it. Each step makes sure it sticks well and lasts a long time. You can try it yourself, but pros know all the tricks. Here’s how it happens: Step 1 – Profile & Grind Our team of experts meticulously preps your floor using our commercial-grade, hardness-specific diamond grinders. Our vacuum systems minimize dust to maintain a clean working environment. Step 2 – Repair & Prepare We use 100% solids to patch any cracks, joints, or pitted areas of your concrete, creating a perfectly smooth surface for our base coat application. Step 3 – Basecoat Application Once your surface is fully prepped, we apply our Industrial-Grade base coat best for your project, allowing it to completely soak into and adhere to your concrete slab. Step 4 – Full Flake Broadcast Flakes of your color choice are generously hand-broadcast for an even, colorful, and robust surface. The flakes are then rolled into the base coat to ensure evenness and maximum adhesion. Step 5 – Excess Flake Removal Once sufficiently cured, all loose and excess flakes are

Protect & Enhance: The Best Garage Floor Coating Options for a Lasting Finish Read More »

Polyaspartic vs Epoxy

Polyaspartic vs Epoxy: A Complete Comparison for Durable Flooring

Choosing the right floor coating for your garage, basement, or patio can feel overwhelming. If you’re torn between polyaspartic vs epoxy, you’re not alone. Epoxy is the familiar name most people know, but polyaspartic is stepping up as a premium alternative. Both can turn dull, stained concrete into a clean, stylish surface, but which one fits your needs? Let’s break it down with a detailed comparison. Polyaspartic vs. Epoxy Flooring: Which One Is Best for Your Project? Choosing the right epoxy floor coating is a big decision. You don’t just want something that looks good but something that lasts, too. Two of the strongest options today are polyaspartic and epoxy. Both are tough, durable, and protect concrete, but they work differently. This guide will break down the key differences in simple terms so you can make the best choice for your project. Understanding Floor Coatings: Base Coat vs. Top Coat Before comparing epoxy and polyaspartic, it’s important to know how floor coatings work. Most systems have two main layers: the base coat and the top coat. The base coat is the first layer that bonds to the concrete. It needs to stick well and provide strength. The top coat is the final protective layer that resists scratches, chemicals, and UV rays. You can use epoxy or polyaspartic for either layer, but each one performs better in certain roles. When it comes to concrete coatings, choosing the right combination of base coat and top coat is critical to long-term performance, durability, and appearance. Whether you’re coating a garage, a patio, or a commercial space, understanding the differences between epoxy, polyurea, and polyaspartic systems will help you make the most informed decision for your environment and usage. While all three materials are incredibly strong and commonly used in the industry, each one performs differently depending on factors like sunlight exposure, temperature fluctuation, and surface conditions. Let’s break down how each one works best and where. The Role of the Base Coat The base coat is the foundation of any concrete coating system. Its primary function is to adhere to the concrete surface and provide a strong anchor for the rest of the system. Both coating types, epoxy and polyaspartic, can be used as base coats, but they behave very differently once applied. Epoxy is often considered the best base coat when maximum adhesion is the goal. Because it cures more slowly, it has more time to penetrate into the concrete pores, creating a deep, lasting bond. This makes it an ideal choice for indoor spaces or shaded areas where sunlight is not a concern. However, epoxy has a well-known drawback: it tends to turn yellow and amber quickly when exposed to direct sunlight. Polyaspartic, on the other hand, is the go-to solution for outdoor or sun-exposed areas. It has the highest UV resistance of the three and holds up the best over time under direct sunlight. However, it cures extremely fast, which limits the time it has to soak into the concrete. That tradeoff means it doesn’t bond quite as strongly as epoxy, but in situations where sunlight protection is the priority, that’s usually a worthy compromise. The Importance of the Top Coat While the base coat handles adhesion, the top coat is your protection layer. This is what shields the system from scratches, UV rays, weather damage, and foot or vehicle traffic. In nearly all professional-grade applications, polyaspartic is the preferred top coat. Polyaspartic finishes are extremely scratch-resistant, resist yellowing from sun exposure, and hold up beautifully even in high-traffic areas. Whether the base is epoxy, polyurea, or polyaspartic itself, applying a polyaspartic top coat creates a clean, durable, and long-lasting finish that protects the integrity of the system. Matching the Right System to the Environment Here’s how to think about it: your environment determines your base, and your desired durability determines your top. In cool, shaded, or indoor areas, epoxy is usually your best base option because of its unmatched bond with the concrete. And in sun-exposed outdoor environments, polyaspartic is the most UV-stable material and is usually preferred as both the base and the top coat, especially when aesthetics and sunlight durability are priorities. Drying Time and Bond Strength: Which Sticks Better? Epoxy is known for its strong bond but slow drying time. It usually takes 12 to 24 hours between coats, which allows it to soak deep into the concrete. This deep penetration creates a strong, long-lasting bond, making epoxy ideal for base coats. Once cured, it forms a thick, durable layer that resists peeling. Polyaspartic, on the other hand, dries extremely fast—often in just 1 to 2 hours. This makes it great for quick jobs, but it doesn’t penetrate concrete as deeply as epoxy. Instead, it bonds mostly on the surface, which makes it less ideal as a base coat. However, its fast curing time makes it perfect for top coats in high-traffic areas. When it comes to adhesion, epoxy is the better choice for base coats because it sticks better and lasts longer. Polyaspartic is weaker as a base coat since it dries too fast to form a deep bond. Sunlight and UV Resistance: Which Won’t Turn Yellow? If your floor gets sunlight, UV resistance is a significant factor. Some coatings turn yellow or fade over time when exposed to UV rays. Polyaspartic is highly UV-resistant, meaning it won’t yellow or fade. This makes it perfect for outdoor spaces like pool decks, patios, and driveways. It’s also a great choice for showrooms or retail spaces with bright lighting. Epoxy, however, does not handle sunlight well. Over time, it will turn yellow when exposed to UV rays, making it a poor choice for outdoor use unless it’s covered by a UV-resistant topcoat. It works best in indoor spaces like garages, basements, and warehouses where sunlight isn’t a concern. When it comes to UV protection, polyaspartic is the clear winner, while epoxy should be avoided in direct sunlight unless sealed with a polyaspartic top coat. Cost: Is

Polyaspartic vs Epoxy: A Complete Comparison for Durable Flooring Read More »

Cost Of Epoxy Floor

Epoxy Garage Floor Cost: A Complete Breakdown for Homeowners

Epoxy flooring has become one of the most popular solutions for residential and commercial garage floors due to its durability, aesthetic appeal, and easy maintenance. Whether you are considering an epoxy garage floor for your home or business, understanding the epoxy garage floor cost is essential to making an informed decision. In this guide, we will break down the epoxy flooring cost, factors affecting pricing, installation options, and whether it’s worth the investment. What is Epoxy Flooring? Epoxy flooring is a type of surface coating made from a combination of resin and hardener that creates a tough, durable, and visually appealing surface. When applied over a concrete floor, epoxy enhances its longevity by making it resistant to stains, impacts, chemicals, and moisture. This makes it an excellent choice for garages, warehouses, basements, and industrial spaces. Epoxy Garage Floor Cost: What to Expect The cost of an epoxy garage floor can vary depending on several factors, such as the type of epoxy being used, square footage, condition of the concrete, apron, moisture level, and stem wall, amongst other factors. On average, homeowners can expect to pay between $5 to $9 per square foot for a professionally installed epoxy floor. Below is a general cost breakdown: Factors Affecting Epoxy Flooring Cost Several factors influence the overall epoxy flooring cost, including: 1. Size of the Floor The larger the garage, the higher the cost. However, per-square-foot pricing may decrease for bigger projects due to economies of scale. 2. Type and Quality of Epoxy There are different types of epoxy concrete floor coatings available: Water-Based Epoxy: Affordable but not as durable Solvent-Based Epoxy: More durable but slightly more expensive  100% Solid Epoxy: Premium quality with maximum durability  3. Condition of the Concrete Floor If your concrete floor requires extensive repairs such as filling cracks, leveling, or moisture control, this can add to the total cost. 4. Number of Coats and Layers Basic epoxy applications involve a primer and a topcoat, but high-end floors may require multiple layers, increasing both material and labor costs. 5. Customization and Design Adding decorative elements such as custom colored flakes, or patterns can increase the overall price of your epoxy garage floor. 6. Labor Costs Professional installation typically costs more but ensures a long-lasting and high-quality finish. DIY epoxy kits can save money but may not provide the same level of durability or visual appeal. Additional Costs to Consider Beyond the basic installation, some additional costs may affect your budget: Surface Preparation: Grinding, patching, or extra moisture barriers may add to the price Sealing and Topcoats: High-quality, and layers of topcoats can add to the price Anti-Slip Additives: A safety feature that may cost around $0.50 to $1 per square foot. UV-Resistant Coating: Protects against sun damage and fading DIY vs. Professional Epoxy Flooring: Cost Comparison Homeowners looking to save money may consider DIY epoxy kits, which typically cost between $50 to $600, covering 250-500 square feet. However, DIY applications often lack the durability and professional finish achieved by experts. Professional installations may cost more upfront but offer a more resilient and long-lasting solution, preventing costly repairs down the road that will eventually save you money. Is Epoxy Flooring Worth the Investment? Epoxy flooring offers a range of benefits that make it a worthwhile investment, including: Durability: Lasts 15-30+ years with proper maintenance Aesthetic Appeal: Available in various colors, finishes, and textures Easy Maintenance: Resistant to stains, chemicals, and abrasions Enhanced Safety: Slip-resistant coatings available Increased Property Value: Boosts resale value due to its attractive finish and durability Frequently Asked Questions (FAQs) 1. How long does epoxy flooring last? With proper care and maintenance, professionally installed epoxy flooring can last 15 to 30+ years. High-traffic areas may require re-coating sooner. 2. Can I apply epoxy flooring myself? Yes, DIY epoxy concrete floor kits are available, but professional installation ensures a more durable and high-quality finish, making it a better long-term investment. 3. How do I maintain my epoxy garage floor? Regular sweeping and occasional mopping with a mild cleaner will keep your epoxy garage floor in top condition. Avoid using harsh chemicals that can damage the surface. 4. Can epoxy be applied over existing concrete floors? Yes, concrete floor epoxy coatings can be applied over existing concrete, but surface preparation, including cleaning, diamond grinding, and repairing cracks, is necessary for a smooth and durable application. 5. What is the best epoxy flooring for a garage? For garages, 100% solid epoxy is the best choice as it offers maximum durability, chemical resistance, and longevity. Conclusion Investing in an epoxy garage floor enhances the durability, appearance, and functionality of your garage space. While epoxy flooring cost varies depending on materials, labor, design, and other elements,  it remains a cost-effective solution compared to traditional flooring options. Whether opting for a DIY approach or professional installation, epoxy flooring is a long-term investment that adds value to any property.  

Epoxy Garage Floor Cost: A Complete Breakdown for Homeowners Read More »

Polyurea vs. Epoxy

Polyurea vs. Epoxy: Which is Best for Your Garage Floor?

When it comes to choosing the right coating for your garage floor, the debate between polyurea and epoxy is a common one. Both options offer durable, protective, and decorative finishes, but they differ significantly in performance, application, and longevity. Understanding the key differences between these two coatings will help you make the best decision for your garage floor based on your budget, environment, and long-term goals. Let’s break it down. What is Epoxy? Epoxy is a thermosetting resin that forms a strong adhesive surface when mixed with a hardener. It bonds exceptionally well to concrete, creating a hard, protective layer that’s both durable and cost-effective. Epoxy has been around for nearly a century and has been widely used in commercial and residential applications since the 1940s. It’s a tried-and-true option that offers excellent adhesion, moisture resistance, and strength. However, epoxy also has some limitations. Like polyurea, it’s prone to chipping and peeling over time, especially in high-traffic areas or when exposed to harsh chemicals. Additionally, epoxy can be yellow when exposed to UV rays, making it less ideal for outdoor or well-lit garages. What is Polyurea? Polyurea is a newer technology, gaining popularity in the last few decades for its rapid curing time and extreme durability. A subset of polyurethane, polyurea is highly flexible, chemical-resistant, and capable of withstanding extreme temperatures (as low as -30°F and as high as 350°F). It’s also UV-stable, meaning it won’t yellow or discolor over time. Polyurea’s quick curing time—often within 4-6 hours—makes it a convenient option for those who need a fast return to service. However, this rapid cure time can also be a drawback, as it limits the coating’s ability to fully penetrate and adhere to the concrete pores compared to epoxy. Key Differences Between Epoxy and Polyurea 1. Cure Time Polyurea: Cures within 4-6 hours, allowing for light foot traffic within a day and full vehicle use within 24 hours. This makes it ideal for time-sensitive projects. Epoxy: Takes 24 hours to dry and 75-96 hours to fully cure. While slower, this extended cure time allows the epoxy to seep deeper into the concrete, creating a stronger bond. 2. Adhesion and Strength Epoxy: Offers superior adhesion, meaning you won’t have to worry about peeling for a long time because it penetrates deeper into the concrete pores. This makes it the stronger choice for long-term durability. Polyurea: While highly durable, its rapid cure time limits its ability to adhere fully to the concrete, making it slightly less robust in terms of adhesion. 3. Moisture Resistance Epoxy: Handles up to twice as much moisture as polyurea, making it the better choice for areas prone to moisture issues. Some epoxy products even come pre-mixed with moisture barriers. Polyurea: Tolerates only about 6 lbs of moisture, often requiring an additional moisture barrier to prevent delamination over time. 4. Flexibility and Crack Resistance Polyurea: Offers over 50% more elongation than epoxy, making it far superior in resisting cracks caused by temperature fluctuations or structural shifts. Epoxy: While just as strong, it’s less flexible and can become brittle in cold temperatures or soften in extreme heat. 5. UV Resistance Polyurea: Remains UV-stable and won’t yellow or discolor over time, making it ideal for outdoor or well-lit areas. Epoxy: Prone to yellowing when directly exposed to UV rays, which can affect its appearance over time. 6. Temperature Tolerance Polyurea: Can be installed in temperatures as low as -30°F, making it suitable for colder climates. Epoxy: Cannot be installed in freezing temperatures, limiting its use in colder regions. Benefits of Epoxy Superior Adhesion: Bonds deeply with concrete for maximum strength. Moisture Resistance: Handles up to twice as much moisture as polyurea. Time-Tested: Decades of refinement and proven performance in various conditions. Benefits of Polyurea Rapid Cure Time: Ready for use within 24 hours. Flexibility: Superior crack resistance with shifts in concrete and elongation properties. UV Stability: Won’t yellow or discolor over time. Temperature Tolerance: Can be installed in extreme cold. Which Is Better for Your Garage Floor? The choice between polyurea and epoxy ultimately depends on your specific needs and environment. Choose Polyurea If: You need a fast turnaround time. You live in a colder climate where temperatures drop below freezing. You want superior flexibility and crack resistance. UV stability and color retention are important to you. Choose Epoxy If: You prioritize maximum adhesion and strength. Moisture resistance is a concern. You’re in a warmer climate and don’t need rapid curing. You want a time-tested, proven solution with decades of refinement. Installation Process Epoxy: The installation process for epoxy involves thorough surface preparation, including diamond grinding to open up the concrete pores. This ensures maximum adhesion. The slower cure time allows the epoxy to seep into the concrete, creating a strong bond. However, the longer curing process means you’ll need to wait several days before using your garage. Polyurea: The installation process is the same, but the quick setting time means it doesn’t penetrate the concrete as deeply as epoxy since it cures faster, which can affect long-term adhesion. However, the fast turnaround is a significant advantage for those who need their garage back in service quickly. Maintenance and Longevity Epoxy: With proper care, epoxy floors can last 15-30 years with very little maintenance other than cleaning. Polyurea: Also requires minimal maintenance due to its flexibility and resistance to cracking. Polyurea floors can last 15+ years with little upkeep, making them a cost-effective option in the long run. Cost Comparison Both offer similar costs that vary by the square footage of your space, the company installing them, and the purity of each product. FAQ’s Which coating lasts longer, epoxy or polyurea? Epoxy typically lasts longer due to its superior adhesion and moisture resistance. However, polyurea’s flexibility and crack resistance can also provide long-lasting performance in the right conditions. Can I install epoxy or polyurea myself? You can, but we don’t recommend it. Both require expert knowledge and experience. Both require diamond grinding for good adhesion. Both require mixing chemicals

Polyurea vs. Epoxy: Which is Best for Your Garage Floor? Read More »

Garage Floor Coating

Garage Floor Coating: Why It’s a Game Changer for Your Space

When upgrading your garage, a high-quality garage floor coating can make a significant difference. Whether you want to enhance durability, improve aesthetics, or make cleaning easier, investing in the right floor coating can transform your space.  Epoxy coatings can last anywhere between 15-30+ years when properly maintained. In addition, research from the National Association of Realtors (NAR) suggests that homes with upgraded garage floors tend to sell faster and at higher prices due to increased curb appeal.  Let’s explore why garage floor coatings are a worthwhile investment. What is Garage Floor Coating? A floor coating is a protective layer applied over concrete to enhance durability and resistance to wear and tear. Common options include epoxy, polyurea, polyaspartic, and urethane coatings, each offering unique benefits. According to the National Association of Home Builders (NAHB), coated garage floors increase a home’s resale value by up to 5% due to their improved aesthetic and functional appeal. Types of Resins for Garage Floor Coatings 1. Epoxy Garage Floor Coatings Epoxy coatings are one of the most popular choices for garages. They create a hard, glossy surface that resists stains, chemicals, and abrasions. However, epoxy takes longer to cure, sometimes up to 72 hours, and is more prone to yellowing when directly exposed to UV rays. 2. Polyurea and Polyaspartic Coatings These coatings are known for their rapid curing times and flexibility. Unlike epoxy, polyurea cures within 24 hours, making it a quicker option. Polyaspartic coatings, a subtype of polyurea, offer enhanced UV resistance, preventing discoloration over time.  Durability and Performance: What to Expect Garage floor coatings significantly improve the strength and longevity of concrete floors. Concrete coated with epoxy or polyurea is 10 times more resistant to wear and impact damage than uncoated concrete. This means fewer cracks, chips, and surface deterioration over time. Cost vs. Long-Term Value These coatings, when professionally installed, typically range between $5-$15/sq ft, depending on the type of floor, and can last 15-30+  years with minimal maintenance, reducing the need for costly repairs and replacements. Maintenance and Longevity Coated garage floors require less upkeep than bare concrete. Regular sweeping and occasional mopping keeps the floor looking pristine. Additionally, garage floor coatings are antimicrobial, reducing bacterial growth and improving hygiene. Garage Floor Coating Cost: What to Expect The cost of these coatings can vary depending on several factors, such as the type of coating being used, square footage, condition of the concrete, apron, moisture level, and stem wall, amongst other factors. On average, homeowners can expect to pay between $5 to $9 per square foot for a professionally installed floor. Below is a general cost breakdown: Factors Affecting Cost Garage Size – Larger garages require more materials and labor, increasing the overall cost Material Choice – The type of coating being installed as there are different solids percentages, as well as the number of layers, and choice of top coat and base coat Preparation Work – Concrete repairs, grinding, and moisture barriers add to installation costs Labor Costs – Professional installation ensures a long-lasting and beautiful finish but raises the total price. Customization – Decorative flakes, metallic finishes, and color choices increase pricing. DIY vs. Professional Installation DIY Epoxy Kits cost between $100 and $500 and cover an average one–car garage (250 sq. ft.). This is typically a lower-quality coating as it is not the industrial-grade material a professional company would use. It also usually bypasses the most important step in the entire installation, which is the diamond grinding process, which ensures longevity. Professional Installation starts at $1,500 for a one-car garage and can exceed $5,000 for a three-car garage with high-end coatings, giving you a better look and peace of mind for a long time. FAQs How long do garage floor coatings last? Depending on usage and maintenance, concrete coatings typically last 15-30+ years. Are garage floor coatings worth the investment? Yes, garage floor coatings provide durability, aesthetics, and protection against moisture, stains, and daily wear. Studies show that coated floors can increase property value by up to 5%, making them a smart upgrade for homeowners. In addition to extending the life of your concrete, they reduce maintenance costs over time. Do these coatings resist oil and chemicals? Yes, epoxy, polyurea, and Polyaspartic coatings create a non-porous barrier preventing oil, gasoline, and other chemicals from penetrating the concrete. This makes cleaning spills easier, as they sit on the surface instead of being absorbed. How long does installation take? Concrete coatings can typically be installed in a day, depending on the size of the floor. Walking on it may be possible within 24 hours, but full vehicle use requires additional time. Polyurea and polyaspartic coatings cure much faster, typically within 24 hours, allowing same-day or next-day use. Conclusion Investing in a garage floor coating not only improves the look of your garage but also extends the life of your floor. Whether you choose Epoxy, Polyurea, or Polyaspartic, you’ll enjoy a durable, easy-to-clean surface that withstands heavy use. If you’re considering upgrading your garage, now is the time to explore high-performance concrete coatings that deliver both style and function.  

Garage Floor Coating: Why It’s a Game Changer for Your Space Read More »

Choosing Quality Over Speed – The Advantages of a 2-Day Installation

In the bustling world of concrete coatings, the drive for quicker installation times has seen a surge in “1-day” coating solutions. But at Buckeye Concrete Coatings, we champion a different approach. We believe in the unmatched strength and longevity of our 2-day coating systems, where the focus is on quality, not speed. Let’s dive into why a 2-day installation isn’t just about timing—it’s about leveraging the best products, expertise, processes, and equipment to deliver excellence. It’s All About the Products One-day systems often rely on polyurea or polyaspartic coatings for quick curing times. While these are fast and efficient, they don’t always offer the best adhesion or depth for long-lasting durability, especially on surfaces with varying moisture levels. Our 2-day process begins with a moisture-mitigating epoxy primer, robustly bonding to the concrete and offering an unparalleled foundation for subsequent layers. This epoxy layer, paired with a final polyaspartic topcoat, harnesses the strengths of both materials—durability and UV resistance—without compromise. Expertise and Precision in Application The essence of our 2-day installation lies in our meticulous application process. Buckeye Concrete Coatings’ team of experts understands the science behind each product and how they interact with Ohio’s diverse climates and concrete conditions. This knowledge allows us to apply each layer precisely, ensuring our coatings adhere and thrive. Our technicians are trained to identify and address any underlying issues before they become problems, a step often rushed or overlooked in faster installations. State-of-the-Art Equipment Quality coatings require quality equipment. Our investment in top-tier tools and machinery ensures that every phase of the installation process is optimized for excellence. From diamond grinding equipment that perfectly prepares surfaces to advanced mixing technologies that provide product consistency, our equipment is a testament to our commitment to quality. This level of investment sets us apart and allows for a superior finish that lasts. Beyond Speed: The Value of Process At Buckeye Concrete Coatings, we understand that true quality takes time. Our 2-day installation process is structured to allow each layer to cure correctly, creating a bond that’s designed to last. This attention to detail extends the lifespan of our coatings, reduces the risk of peeling or delamination, and ensures that your concrete is protected against moisture, UV damage, and everyday wear and tear. Why Choose Buckeye Concrete Coatings Choosing our 2-day system means opting for a solution that looks beyond the immediate allure of speed. It’s choosing a system that stands the test of time, backed by a team prioritizing your satisfaction and peace of mind. Our installations come with guarantees that cover moisture-related issues, something seldom offered by “1-day” solutions. Our approach may take a bit longer, but the results speak for themselves: a beautiful, durable, and reliable coating that enhances your space. When you select Buckeye Concrete Coatings, you’re not just getting a new floor—you’re investing in the future of your home or business. Experience the Buckeye difference. Reach out today to learn more about our 2-day coating systems and how we can transform your space with integrity, expertise, and an eye for lasting beauty.

Choosing Quality Over Speed – The Advantages of a 2-Day Installation Read More »