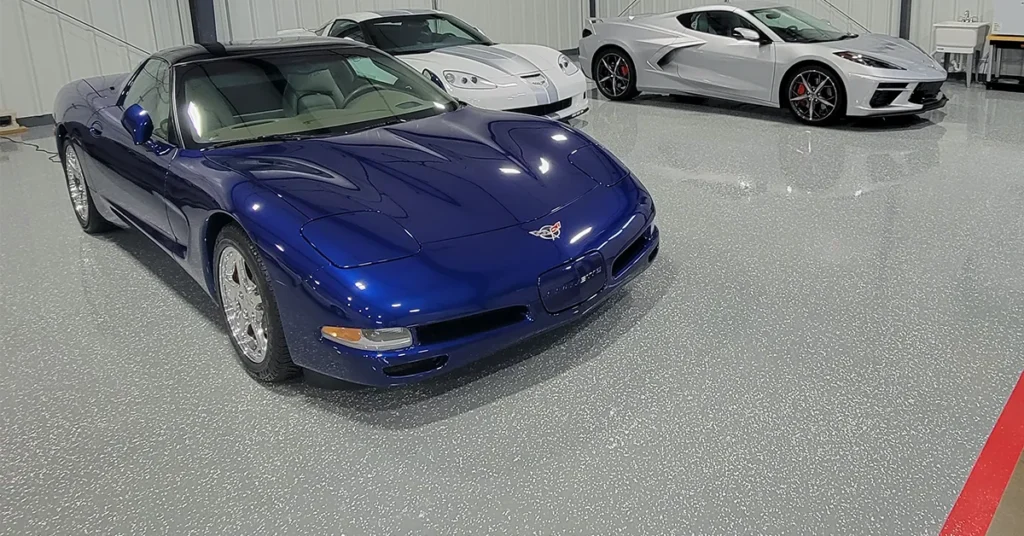
Is your garage floor looking a little rough these days? Maybe it’s cracked, stained, or just doesn’t have that clean, polished look anymore. The good news is that you don’t need to live with it. A garage floor coating can transform your space, making it stronger, cleaner, and better-looking.
Whether you park your car, store tools and bikes, or even use the garage as a gym or hangout spot, the right coating adds both protection and style. In this guide, we’ll walk you through the best types of garage floor coatings, how to choose the best fit for you, and how they’re installed. By the end, you’ll have everything you need to pick the perfect option for your space.
Why Should You Coat Your Garage Floor?
Concrete is tough, but it’s not perfect. Over time, it can crack, stain, and wear down. Water, oil, dirt, and heavy use all take their toll. A floor coating acts like armor for your garage. It protects the surface and keeps it looking fresh and clean.
One of the biggest benefits of a coated garage floor is durability. With the right coating, your floor can handle heavy vehicles, tools being dropped, and even chemical spills. These coatings also make cleaning incredibly easy. You can wipe up oil or other messes with a cloth instead of spending hours scrubbing.
The Best Garage Floor Coating Options
When it comes to concrete coatings, choosing the right system is key. The most popular systems you find in the market are:
- Epoxy
- Polyaspartic
- Polyurea
All coatings have their pros and cons, but the right combination of base coat and top coat is critical for long-term performance, durability, and appearance. Whether you’re coating a garage, a patio, or a commercial space, understanding the differences between epoxy, polyurea, and polyaspartic systems will help you make the most informed decision for your environment and usage.
While all three materials are incredibly strong and commonly used in the industry, each one performs differently depending on factors like sunlight exposure, temperature fluctuation, and surface conditions. Let’s break down how each one works best — and where.
The Role of the Base Coat
The base coat is the foundation of any concrete coating system. Its primary function is to adhere to the concrete surface and provide a strong anchor for the rest of the system. All three coating types, epoxy, polyurea, and polyaspartic, can be used as base coats, but they behave very differently once applied.
Epoxy is often considered the best base coat when maximum adhesion is the goal. Because it cures more slowly, it has more time to penetrate into the concrete pores, creating a deep, lasting bond. This makes it an ideal choice for indoor spaces or shaded areas where sunlight is not a concern. However, epoxy has a well-known drawback: it tends to turn yellow and amber quickly when exposed to direct sunlight.
Polyurea is known for its flexibility and durability in cold climates. In environments where temperatures drop below freezing and the concrete frequently expands and contracts, polyurea outperforms other options. While it doesn’t bond as deeply as epoxy, it provides excellent resilience and won’t crack under thermal stress. It does yellow over time, but more slowly than epoxy.
Polyaspartic, on the other hand, is the go-to solution for outdoor or sun-exposed areas. It has the highest UV resistance of the three and holds up the best over time under direct sunlight. However, it cures extremely fast, which limits the time it has to soak into the concrete. That tradeoff means it doesn’t bond quite as strongly as epoxy, but in situations where sunlight protection is the priority, that’s usually a worthy compromise.
The Importance of the Top Coat
While the base coat handles adhesion, the top coat is your protection layer. This is what shields the system from scratches, UV rays, weather damage, and foot or vehicle traffic. In nearly all professional-grade applications, polyaspartic is the preferred top coat.
Polyaspartic finishes are extremely scratch-resistant, resist yellowing from sun exposure, and hold up beautifully even in high-traffic areas. Whether the base is epoxy, polyurea, or polyaspartic itself, applying a polyaspartic top coat creates a clean, durable, and long-lasting finish that protects the integrity of the system.
Matching the Right System to the Environment
Here’s how to think about it: your environment determines your base, and your desired durability determines your top.
In cool, shaded, or indoor areas, epoxy is usually your best base option because of its unmatched bond with the concrete.
In cold climates where freezing and thawing cycles are common, polyurea is the best choice thanks to its flexibility and resistance to cracking.
And in sun-exposed outdoor environments, polyaspartic is the most UV-stable material and is usually preferred as both the base and the top coat — especially when aesthetics and sunlight durability are priorities.
How Are Garage Floor Coatings Installed?
Putting a coating on your floor takes some work, but it’s worth it. Each step makes sure it sticks well and lasts a long time. You can try it yourself, but pros know all the tricks. Here’s how it happens:
Step 1 – Profile & Grind
Our team of experts meticulously preps your floor using our commercial-grade, hardness-specific diamond grinders. Our vacuum systems minimize dust to maintain a clean working environment.
Step 2 – Repair & Prepare
We use 100% solids to patch any cracks, joints, or pitted areas of your concrete, creating a perfectly smooth surface for our base coat application.
Step 3 – Basecoat Application
Once your surface is fully prepped, we apply our Industrial-Grade base coat best for your project, allowing it to completely soak into and adhere to your concrete slab.
Step 4 – Full Flake Broadcast
Flakes of your color choice are generously hand-broadcast for an even, colorful, and robust surface. The flakes are then rolled into the base coat to ensure evenness and maximum adhesion.
Step 5 – Excess Flake Removal
Once sufficiently cured, all loose and excess flakes are scraped away from your surface, followed by complete removal with our commercial-grade blowers and vacuums.
Step 6 – Topcoat Application
Once the above steps are complete, your coating is finalized by an even application of our Industrial-Grade topcoat.
What Does It Cost?
The cost of a garage floor coating depends on a few different factors, including the size of your garage, the condition of the concrete, and the type of coating you choose.
Many people assume that polyaspartic is more expensive than epoxy, but that’s not always true. A high-quality epoxy can cost just as much as polyaspartic. While a cheap polyaspartic might be weaker than a premium epoxy. Instead of choosing based on price alone, focus on the quality of the product and its suitability for your project. A slightly more expensive coating may save you money in the long run by lasting longer and requiring fewer repairs.
FAQs
What is a garage floor coating?
It’s a protective layer applied to your concrete floor to prevent stains, cracks, and wear while improving appearance.
How long does it last?
Most coatings last between 15 and 30 years with proper care. With occasional maintenance, some can go even longer.
Are garage floor coatings really worth the money?
Absolutely. A coated garage floor stays clean, resists damage, and can boost your home’s resale value.
Can I coat the floor myself?
Yes, but for more advanced coatings and proper finishing, hiring a pro is usually the better choice.
Final Thoughts
No single coating is perfect for every situation, but by understanding how epoxy, polyurea, and polyaspartic perform under different conditions, you can create a customized coating system that balances adhesion, durability, and environmental resistance.
At the end of the day, most professional installations use a combination approach: choosing the base coat based on the substrate and climate and finishing with a polyaspartic top coat for maximum protection.
If you’re unsure what system is best for your specific project, it’s always worth talking to an expert. With the right combination, you’ll get a floor that not only looks incredible but lasts for years to come.


