

Polished concrete floors are quickly becoming popular for homes and businesses. Their sleek, modern appearance and low maintenance make them a go-to flooring solution. If you want to upgrade your space, polished concrete offers style, durability, and a cost-effective solution. It’s a versatile option, taking over due to its beauty and functionality.
What sets polished concrete apart is its ability to transform dull, plain concrete into something elegant. The process is simple but requires attention to detail and the right tools. Suppose you’re curious about how to get that perfect polished concrete floor. In that case, this guide will take you through the entire process, from preparation to polishing. Whether you’re working on an existing floor or starting fresh, polished concrete offers a flooring solution that’s both eco-friendly and practical.
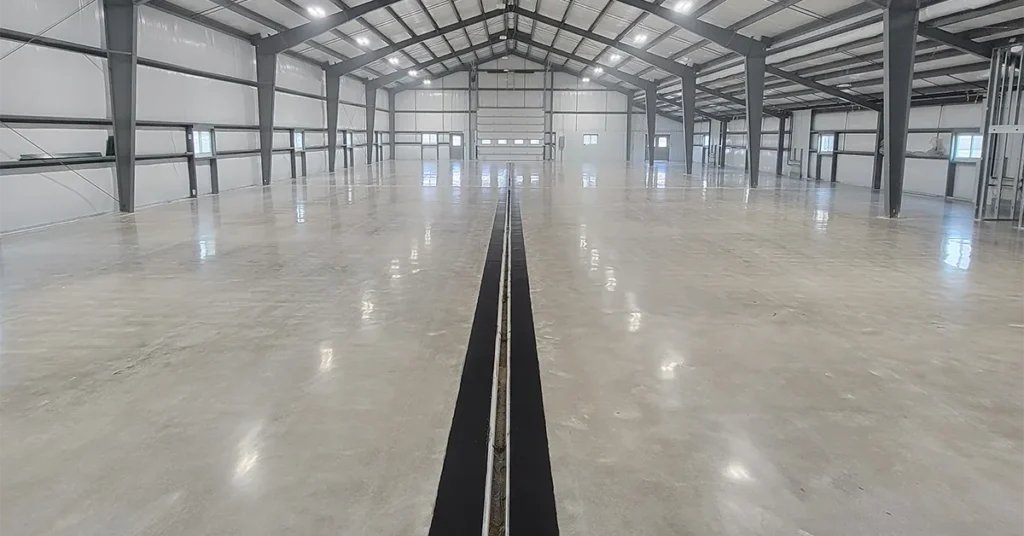
What is Polished Concrete?
Polished concrete refers to a concrete surface being ground, honed, and polished using specialized equipment and diamond abrasives. The process starts by removing the top layer of concrete and exposing the aggregates underneath. Once exposed, these aggregates are smoothed and polished to create a glossy, reflective finish.
Many people choose polished concrete not only because it looks great but because it’s highly durable and requires minimal upkeep. The finish resists stains, abrasions, and wear, perfect for high-traffic areas. It’s also an affordable option in the long run because it doesn’t require constant maintenance. Polished concrete is suitable for large and open spaces in homes, offices, and industrial properties alike.
Benefits of Polished Concrete Floors
Before discussing how to polish your own floors, let’s explore some of the reasons why people are falling for polished concrete.
Durability
Polished concrete floors are incredibly tough. Concrete is naturally durable, but it becomes even more resilient when polished. These floors withstand heavy foot traffic, making them ideal for kitchens, warehouses, offices, or retail spaces. Polished concrete is also resistant to cracks, stains, and abrasions, so it’s built to last. Even spills or heavy use won’t damage the surface easily.
Low Maintenance
One reason people are falling in love with polished concrete is its maintenance. Its smooth surface makes cleaning a breeze. Dirt or grime won’t settle in cracks like tile grout or carpet fibers. A simple mop is often needed to keep the floor spotless. Polished concrete doesn’t require frequent waxing or resealing, which can be time-consuming and costly for other floor types.
Aesthetic Appeal
The glossy finish of polished concrete can dramatically improve the look of any room. The shine helps reflect light, making even small spaces feel bigger and brighter. Polished concrete is versatile, whether you want a mirror-like finish or a more subtle matte look. You can also get creative by adding stains or dyes to create unique patterns or colors, adding a personal touch to the space.
Versatility in Design
Polished concrete is highly customizable. You can choose the look that best fits your space, from traditional gray concrete to more decorative options. The polishing process reveals the natural aggregates in the concrete, which can give a terrazzo-like appearance. Plus, you can add different stains or coatings to create colors and designs that complement the rest of your interior. The endless options make it easy to match any style or theme.
Slip Resistance
While polished concrete is smooth and shiny, it doesn’t mean it’s slippery. The surface can be treated to ensure enough traction, especially in high-traffic or wet areas like kitchens and bathrooms. Anti-slip treatments are also available to increase safety, ensuring that polished concrete is practical and stylish.
Step-by-Step Guide to Polishing Concrete Floors
Polishing concrete may seem daunting initially, but it’s a manageable process with the proper steps. Here’s a detailed guide to help you through the polishing process:
1. Surface Preparation
This step is essential to ensuring the final result is flawless.
- Clean the Concrete: Remove any dirt, adhesives, or existing coatings to ensure the surface is clean and ready for grinding.
- Repair Cracks and Holes: Any cracks or holes should be filled with epoxy or a semi-rigid filler. This helps create a smooth, even surface.
- Seal Expansion Joints: Sealing any expansion joints prevents uneven surfaces when grinding and polishing.
- Test Concrete Hardness: Concrete’s hardness can vary, so testing helps determine which grinding discs and techniques work best.
2. Grinding
Grinding is where you start to see the transformation.
- Coarse Grit: Begin with a 30- or 40-grit diamond to remove surface imperfections and start leveling the concrete.
- Progress to Finer Grits: Gradually increase the grit size (e.g., 80, 150) to remove scratches and smooth the surface.
- Use 150-Grit or Finer: This step smoothens any remaining rough patches, refining the surface for polishing.
- Grouting (if needed): If noticeable gaps exist, apply a grout to fill them in for an even finish.
3. Polishing
Polishing is responsible for the shine and smoothness of your concrete.
- Apply a Densifier: Densifiers are chemicals that penetrate the concrete, making the surface denser and more durable.
- Start with 100- or 200-grit Resin: This begins polishing, removing rough textures left behind by grinding.
- Use Finer Grits: Move up to 400, 800, 1500, and even 3000 grits to refine the finish and achieve the level of gloss you desire.
- Buff the Surface: After attaining the desired shine, use a buffer to smooth out any final rough spots and enhance the shine.
- Optional Stain Guard: Apply a protective coating to keep the surface looking new and make cleaning easier.
4. Finishing Touches
Once the polishing process is complete, it’s time to perfect your floor.
- Remove Dust: Vacuum any dust or debris left behind during the grinding and polishing stages.
- Buff the Floor Again: A final buff will smooth out imperfections and enhance the finish.
- Optional Sealing: Apply a sealer for additional protection and to enhance the shine, especially in high-traffic areas.
5. Optional Staining
You can personalize your polished concrete floor with colors or patterns.
- Concrete Stains: Concrete stains are available in various colors, allowing you to add depth and creativity to your polished concrete. Whether you want a uniform color or a more marbled look, stains can help you create the look you’ve been looking for.
Types of Polished Concrete Finishes
Polished concrete offers various finishes to suit different needs and styles. Here are some of the most common finishes:
Glossy Finish
This high-shine finish is ideal for creating a sleek, modern look. It’s achieved using fine diamond pads and is perfect for spaces that need an upscale, clean appearance. Glossy finishes are easy to maintain and reflect light, brightening the room.
Matte Finish
If you prefer a more subtle look, opt for a matte finish. While still smooth and refined, this finish doesn’t have the reflective quality of a glossy finish. Matte finishes are ideal for residential spaces or places that require a softer, less flashy look.
Exposed Aggregate
Exposed aggregate is a finish where the top layer of concrete is ground away to reveal the natural aggregates within. This gives the concrete a textured, rustic appearance. It’s popular for driveways, patios, and indoor spaces that want a more natural, earthy look.
Burnished Finish
A burnished finish offers a bit of shine without the full gloss. This is ideal for spaces that need a polished look without a mirror-like finish. It’s often used in high-traffic commercial areas.
Common Mistakes to Avoid
Polishing concrete is a straightforward process, but these common mistakes can ruin your results:
Skipping Surface Prep
If you want a perfect finish for the polished concrete, never skip the preparations. Good preparation plays a vital role in achieving a perfect finish. Skipping the cleaning, crack repair, or grinding stages can produce a subpar result.
Using the Wrong Equipment
Using improper tools, like incorrect grinding discs or polishing pads, can leave behind scratches or uneven patches that are hard to fix.
Not Using a Densifier
Densifiers are essential for enhancing durability and achieving the best finish. Skipping this step could result in a weaker surface.
Polishing Too Quickly
Take your time during the grinding and polishing stages. Rushing can cause uneven results and imperfections in the finish.
FAQs
Can I polish existing concrete floors?
Yes, as long as they are in good condition. Repair any cracks before polishing.
How long does it take to polish concrete floors?
It depends on the size and condition of the floor, but the process generally takes one day to several days.
Can I change the color of my concrete floor during polishing?
Yes, you can stain or dye the concrete before polishing to achieve a custom look.
How often do I need to reseal my polished concrete floors?
Typically, resealing is recommended every 3 to 5 years, depending on the level of traffic.
Conclusion
Polishing concrete floors is a simple yet effective way to enhance your space. With time and effort, you can achieve a beautiful, durable, and easy-to-maintain floor that is perfect for any environment. Whether you’re doing it yourself or hiring a professional, polished concrete is an investment that will add lasting value and style to your home or business.