

A garage is often one of the most overlooked areas in a home. For many homeowners, it becomes a catch-all for tools, storage boxes, sports gear, and seasonal items. Over time, the concrete floor can start to look worn, stained, and dull. If you want to transform your garage into a cleaner, brighter, and more functional space, a DIY epoxy garage floor project is one of the best upgrades you can make without spending a fortune.
Epoxy flooring has become incredibly popular because it blends beauty, durability, and affordability. Whether your goal is to protect your concrete, improve your garage’s appearance, or create a showroom style surface, epoxy can help you achieve that professional look at a budget friendly cost. With a little planning and some hands-on effort, you can create a flawless floor that dramatically enhances your garage.
In this complete guide, you will learn everything you need to know about starting a DIY epoxy garage floor makeover. From tools and materials to design ideas, preparation steps, and application techniques, this article covers every detail to ensure your project turns out smooth and long lasting.
Why Choose an Epoxy Garage Floor
Epoxy is one of the most durable and cost effective floor coatings available. If you have ever admired the glossy, seamless floors in auto shops, gyms, or showrooms, chances are they were finished with epoxy.
Here are some of the top reasons homeowners choose a diy garage floor epoxy coating.
1. Strong Protection for Your Concrete
Concrete is tough, but it absorbs oil, stains, dirt, and moisture. Over time, it can crack, crumble, or discolor. An epoxy layer acts like a shield and prevents damage, which increases the lifespan of your floor.
2. Easy to Clean and Maintain
One of the biggest advantages of an epoxy surface is how simple it is to maintain. Dust, spills, and debris sit on the surface instead of soaking into the concrete. This means you only need basic sweeping and mopping to keep the floor looking new.
3. Great for Budget Friendly Makeovers
A full garage renovation can be expensive. Epoxy flooring provides a quick and affordable upgrade that immediately improves your space. Even high quality kits are significantly cheaper than tiles, mats, or professional coatings.
4. Stunning Visual Appeal
Epoxy is not only functional, it is beautiful. You can choose from solid colors, flakes, metallic finishes, and custom patterns. This gives you the freedom to match the floor to your personal style, home decor, or even your favorite car.
5. Increased Home Value
A garage that looks organized, clean, and upgraded can increase the overall appeal of your home. Buyers often appreciate well maintained garages, and an epoxy floor is a feature that stands out.
What You Need Before You Start Your DIY Epoxy Garage Floor Project
Before applying any coating, you must understand the materials and tools required to get professional results.
Tools You Will Need
- Concrete degreaser
- Concrete etcher or grinder
- Stiff bristle brush or floor scrubber
- Pressure washer or hose
- Painter’s tape
- Protective gloves
- Respirator mask
- Mixing bucket
- Roller frame and extension pole
- Squeegee (optional)
Materials You Will Need
- Epoxy coating kit
- Epoxy primer (recommended for best adhesion)
- Decorative flakes (optional)
- Clear topcoat for added durability
Always read the instructions included in your epoxy kit before starting. Each brand may have slightly different ratios and working times.
How to Prepare Your Garage for DIY Epoxy Application
Preparation is the most important step in any diy epoxy garage floor project. A flawless finish depends on how well you clean and prep the concrete.
Step 1. Remove Everything from the Garage
Clear the space completely. This helps you see floor imperfections and ensures even application.
Step 2. Clean and Degrease
Scrub the floor with concrete cleaner or degreaser. Pay special attention to oil spots and stains. Rinse thoroughly and let the floor dry.
Step 3. Repair Cracks and Holes
Use concrete filler or patching compound to fix cracks and chips. A smooth surface leads to a smoother epoxy finish.
Step 4. Etch or Grind the Concrete
Etching opens the pores of the concrete so the epoxy can bond tightly. You can use an acid etcher or a floor grinder. Rinse again and allow the floor to dry for 24 hours.
Step 5. Test for Moisture
Tape a plastic sheet to the floor and wait 24 hours. If moisture forms underneath, you may need a moisture barrier primer.
Proper prep prevents peeling, bubbling, and uneven textures, which is why this step is so critical.
DIY Epoxy Garage Floor Application Guide
Once your concrete is clean and dry, it is time to apply the epoxy. Work carefully and stay within the recommended working time because epoxy begins to harden soon after mixing.
Step 1. Mix the Epoxy
Epoxy usually comes in two parts that must be combined. Mix slowly to avoid air bubbles and follow the exact ratios.
Step 2. Apply the Primer
A primer helps the epoxy bond better and provides a uniform base. Use a roller to apply it evenly.
Step 3. Spread the Epoxy Coating
Pour the mixed epoxy onto the floor in sections. Use a roller or squeegee to spread it evenly. Work in small areas and maintain a consistent pattern.
Step 4. Add Decorative Flakes (Optional)
While the epoxy is still wet, broadcast the flakes by tossing them upward so they fall evenly. Flakes hide imperfections and improve traction.
Step 5. Apply the Clear Topcoat
After the first coat dries (usually 12 to 24 hours), finish the floor with a clear topcoat. This protects against scratches, chemicals, and UV damage.
Step 6. Let It Cure
Avoid walking on the floor for at least 24 hours. Wait 72 hours before driving on it.
Your DIY epoxy garage floor will continue to harden over the next week, becoming stronger and more durable.
Budget Friendly DIY Epoxy Garage Floor Ideas
You do not need to spend a lot to create a stylish and durable garage floor. Here are some creative ideas to help you upgrade your space without overspending.
1. Solid Color Epoxy
A single color is the most affordable option. Popular choices include gray, beige, white, and charcoal. It looks clean and modern.
2. Two Tone Borders
Use one primary color for the majority of the floor and a darker shade around the edges. This adds a polished and professional touch.
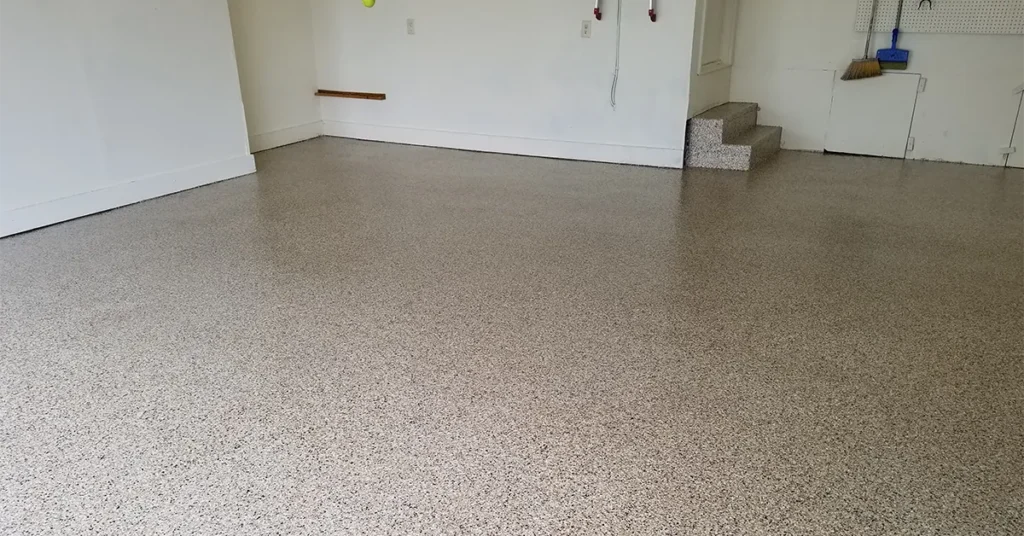
3. Flake Epoxy Finish
Color flakes are inexpensive and can create a textured, decorative finish. You can choose subtle neutral mixes or bold colors.
4. Metallic Epoxy Swirls
If you want something unique, metallic epoxy creates a liquid metal effect. This is slightly more advanced but still achievable with patience.
5. High Gloss Showroom Style
Use a glossy topcoat for a reflective finish. This looks especially impressive if you store a car or motorcycle you want to highlight.
6. Add Garage Zone Striping
Use paint or epoxy to mark off areas for tools, parking, or storage. This improves organization and gives your garage a professional look.
7. Two Coat Epoxy System
Using a primer and a topcoat only adds a little to the cost but produces better results and longer durability. It is one of the best value upgrades you can make.
How to Maintain Your DIY Epoxy Garage Floor
Epoxy floors are low maintenance, but a few simple habits will keep them looking flawless for years.
- Sweep regularly to remove dust and grit.
- Mop with a gentle cleaner and warm water.
- Avoid abrasive scrubbers.
- Wipe spills quickly to prevent staining.
- Use mats under heavy equipment.
Proper care ensures your new epoxy floor lasts for many years without losing its shine or strength.
FAQ’s
How long does a DIY epoxy garage floor last?
A well installed epoxy floor can last 10 to 20 years. Adding a topcoat and doing regular maintenance extends the lifespan significantly.
Can I apply epoxy if my garage floor has stains?
Yes. Stains must be cleaned and the floor must be degreased and etched. Once properly prepped, epoxy adheres well to stained concrete.
Is a DIY epoxy garage floor slippery?
A high gloss finish can be slippery when wet. Adding anti slip additives or decorative flakes improves traction and safety.
How much does a DIY epoxy garage floor cost?
Most DIY epoxy kits cost between 100 and 300 dollars depending on brand and size. This makes it one of the most cost effective garage upgrades.
Can I apply epoxy in cold weather?
Epoxy needs the right temperature to cure properly. Most products require temperatures between 55 and 85 degrees Fahrenheit during application.
Conclusion
Upgrading your garage with a DIY epoxy garage floor is one of the most rewarding and cost effective home improvement projects you can tackle. With the right preparation, materials, and techniques, you can transform a dull concrete surface into a strong, glossy, and stylish floor that elevates the entire space. Whether you choose solid colors, flake finishes, or unique metallic designs, epoxy offers endless possibilities for personalization while staying within your budget.
If you want a clean, durable, and modern looking garage, a diy garage floor epoxy project is the perfect weekend makeover. With long lasting protection, simple maintenance, and impressive visual appeal, epoxy flooring delivers results that feel professional without the professional price.