

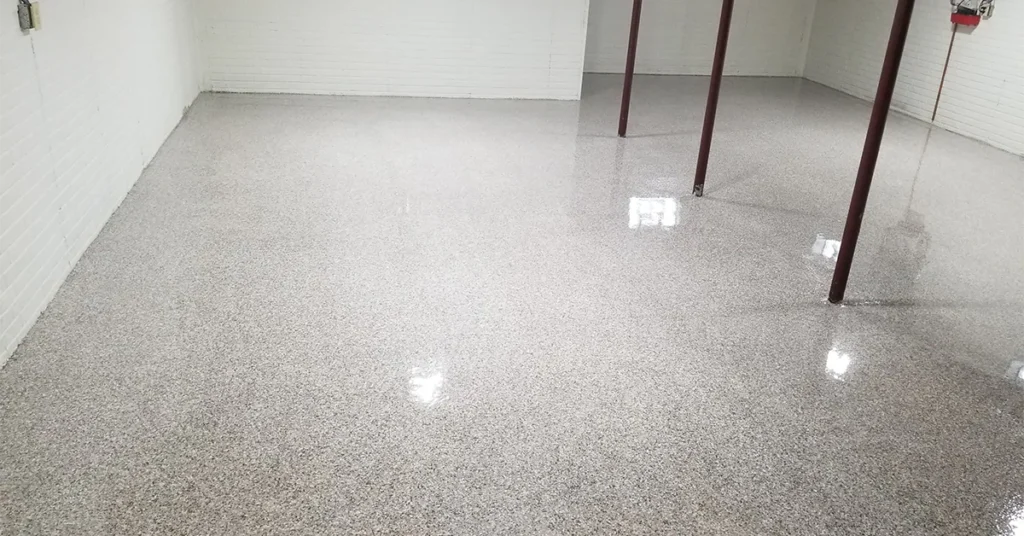
When you need flooring for your garage, business, or workshop, you want something that not only looks good but also lasts a long time. Epoxy flakes have become one of the most popular ways to make epoxy floors look amazing while making them stronger and safer.
Garages, stores, showrooms, and workshops all use epoxy floor flakes because they add color, texture, and better grip without losing the strength that epoxy is famous for. These are the same heavy-duty products used in businesses, now being used in homes. That shows you how tough and reliable they really are.
This guide shows you exactly how to install an epoxy floor with flakes, explains the factors that affect the cost, and helps you understand the different coating layers that make your floor strong and long-lasting.
What Are Epoxy Flakes and Why Choose Them
Epoxy flakes are small, colored chips made from vinyl or acrylic. You sprinkle them onto a wet epoxy coating to create texture, add style, and improve the floor’s performance.
Lots of color choices
Epoxy flakes come in hundreds of colors. You can pick solid colors, mix different colors together, choose metallic looks, or create custom blends that match your space.
Better grip and safety
The texture from epoxy floor flakes helps you walk safely on the floor, especially in areas that might get wet or slippery.
Hides problem spots
Flakes help cover up small cracks, stains, and uneven spots in your concrete that would show through plain coatings.
Extra strength
The flakes become locked into the coating, making the entire floor thicker and more resilient against damage.
Where Epoxy Floor with Flakes Works Best
This type of flooring works great in many places:
- Home garages
- Stores and showrooms
- Restaurants and kitchens
- Gyms and workout spaces
- Car dealerships and repair shops
- Warehouses and factories
- Animal clinics and kennels
- Pool areas, patios, and driveways
- Locker rooms and bathrooms
- Hotels and event halls
Each space gets the benefits of good looks and practical features that epoxy flakes bring. The fact that these are business-grade systems being used in homes demonstrates their strength and durability.
Understanding Base Coats and Top Coats for Epoxy Flake Systems
Before we talk about installation, you need to know about the different coating layers. How well your epoxy floor with flakes performs depends a lot on picking the right base coat and top coat together.
The base coat: Your foundation
The base coat is the layer where you spread your epoxy flakes. This layer must adhere extremely well to the concrete and provide a solid foundation for everything else. You have three main choices:
Epoxy base coat
Epoxy base coat is what most people use for indoor spaces, such as garages, basements, and business floors, that don’t receive direct sunlight. Epoxy takes longer to dry than other options, allowing it more time to penetrate deeply into the concrete. This creates a super strong connection to your floor. Epoxy also usually has built-in protection against moisture, which helps prevent problems that can make coatings fail.
Polyaspartic base coats
Polyaspartic base coats work better for outdoor spaces where the sun shines directly on the floor. It handles UV rays exceptionally well and won’t turn yellow, even in constant sunlight. This makes it perfect for patios, pool decks, and driveways. But polyaspartic dries very fast, which means it has less time to soak into the concrete. This makes the connection slightly weaker compared to epoxy.
Polyurea base coat
Polyurea base coat is the best choice for really cold places where the ground freezes and thaws over and over. It stays flexible even when temperatures get extreme, which stops it from cracking when the concrete expands and shrinks. Like polyaspartic, it dries quickly and doesn’t bond quite as deeply as epoxy, but being flexible makes up for this in places with big temperature changes.
The top coat: Your protection layer
The top coat seals the flakes in place and protects everything from wear, chemicals, and sun damage.
Polyaspartic top coat is what professionals use and recommend for almost all epoxy flake floors. It resists scratches better than any other coating, won’t turn yellow from sunlight, and creates a crystal-clear finish that makes the flakes look beautiful. Polyaspartic top coats dry quickly, so you can finish the project faster and use the floor sooner.
Picking the right combination
For most indoor projects like garages, basements, and business interiors, the best choice is an epoxy base coat with a polyaspartic top coat. This gives you the strongest connection to concrete from the epoxy while getting the sun protection and scratch resistance from the polyaspartic top coat. Since you’re covering the epoxy base with decorative flakes anyway, any yellowing that might occur with the epoxy remains hidden.
For outdoor projects with direct sun, like patios, pool decks, and driveways, a polyaspartic base coat with a polyaspartic top coat is usually recommended. This provides maximum protection from the sun throughout the entire system, ensuring that nothing yellows or changes color over time.
For cold-weather areas where freezing and thawing happen a lot, a polyurea base coat with a polyaspartic top coat gives you the flexibility to handle temperature changes while keeping a tough, scratch-resistant surface.
Step-by-Step Installation Process for Epoxy Floor Flakes
Installing an epoxy floor with flakes takes careful prep work and good timing. Here’s how it works:
Step 1: Preparing the surface and testing for moisture
The concrete has to be clean, dry, and ready for coating. Testing for moisture is really important because too much moisture will make the coating fail, no matter which product you use. Grinding or blasting the surface opens up the concrete so coatings can stick properly. You have to remove any old coatings, oil, grease, or dirt.
Step 2: Fixing cracks and damage
All cracks and damaged spots have to be filled and made level. This creates a smooth, even surface for the coating.
Step 3: Apply primer if needed
Depending on what condition your concrete is in and which coating system you pick, you might need to apply a primer coat to seal the concrete and help everything stick better.
Step 4: Putting down the base coat
The base coat (epoxy, polyaspartic, or polyurea) gets rolled or spread across the floor. This layer provides the foundation and the wet surface where you’ll spread the flakes. Which base coat you pick depends on your space, whether it’s indoors or outdoors, temperature, and sun exposure.
Step 5: Spreading the epoxy flakes
While the base coat is still wet, you spread epoxy flakes by hand all over the surface. This is where timing really matters. Epoxy base coats give you more time to work, while polyaspartic and polyurea make you work faster. Coverage can be light (some flakes), medium, or full (completely covered). Full coverage gives you the most texture and strength.
Step 6: Letting it cure properly
The base coat with the flakes in it has to dry completely. How long this takes depends on the product and temperature. Polyaspartic dries fastest, and epoxy takes longer.
Step 7: Scraping off loose flakes
After the base coat dries, any loose flakes that didn’t stick get scraped off the surface. This makes sure the finish is smooth for the top coat.
Step 8: Putting on the top coat
The clear top coat (polyaspartic is recommended) goes on in one or more layers. This seals the flakes in place, protects the floor from wear, and helps it resist chemicals. Polyaspartic top coats give you the best scratch resistance and sun protection.
Step 9: Final drying time
The floor has to cure all the way before you can use it. Polyaspartic top coats dry faster than epoxy. You can often walk on it lightly within a day and drive on it within a few days.
Understanding the Cost Factors for Epoxy Flakes Flooring
How much you invest in an epoxy floor with flakes depends on several important things. Knowing these helps you make smart choices and understand what makes a quality job.
Material quality and solid content
One of the biggest cost factors is something called solid content in the coatings. This means how much actual coating material is in the product versus fillers or liquids that evaporate. Products range from lower to premium quality across all coating types, including epoxy, polyaspartic, and polyurea.
Better installations use higher quality products with more solids, which make thicker, tougher coatings. Lower-quality products might need more coats to get the same thickness and strength. The solid content matters more than which specific product type you pick when it comes to quality and how long it lasts.
Material parts
Several material factors affect the overall investment:
- Base coat quality: How good the base coat material is
- Flake amount and type: How much coverage (some vs full) and special flakes like metallics
- Top coat quality: Better polyaspartic finishes give superior protection
- Prep materials: Primers, crack fillers, and patching products as needed
Labor and installation skills
Professional installation costs reflect several important things:
- Where you live and local rates
- How big and complex the project is
- What condition the surface is in, and how much prep it needs
- How many coats go into the system
- How much flake coverage and how it’s applied
- How experienced the installer is and what warranty they offer
Bigger projects usually cost less per square foot, while smaller projects might have higher rates because of minimum service requirements.
How complex the system is
How fancy your chosen system is affects what you invest:
- Basic systems: Simpler coating with some flake coverage
- Standard systems: Full flake coverage with quality base and top coats
- Premium systems: High-quality materials, multiple top coats, and special finishes
Key Things That Affect Your Investment
Several things impact how much your project costs:
Floor condition
Floors with lots of damage, moisture problems, or old coatings need more prep work, which raises the overall investment.
Project size
Bigger projects benefit from better efficiency, lowering the cost per square foot. Smaller projects might cost more per square foot because of minimum charges and setup costs.
Flake coverage amount
Full-coverage systems use more material and require more labor than partial coverage, which affects the overall investment.
Number of protective coats
Extra top coat layers give more protection and make it last longer, but add to material and labor needs.
FAQ’s
Should I use epoxy or polyaspartic for my epoxy flake floor?
For indoor spaces like garages and basements, an epoxy base coat with polyaspartic top coat works best. The epoxy adheres more strongly to concrete, and the polyaspartic topcoat provides scratch resistance and sun protection.
How long does it take to install epoxy floor flakes?
A typical home garage takes a few days, including prep, coating, and drying time. Polyaspartic systems dry faster than pure epoxy systems, which might cut a day off the project. Bigger business projects might take longer, depending on size and how complex they are.
Why is polyaspartic recommended as a top coat?
Polyaspartic is the most scratch-resistant coating you can get. It has superior sun protection that prevents yellowing and dries quickly, so you can finish faster. It’s what professionals use for top coats, no matter which base coat product you choose.
What flake coverage is best?
Full coverage gives you maximum strength, texture, and slip resistance. Partial coverage gives a more subtle look with less texture. The choice depends on what you want and how you’ll use it. Full coverage is recommended for business spaces and busy home garages.
Do epoxy flake floors work in cold weather?
Yes, but picking the right product matters. Polyurea base coats are made specifically for places that freeze and thaw because they stay flexible in extreme temperatures. Combined with a polyaspartic top coat, this stops cracking from temperature changes while staying tough.
Final Thoughts
Epoxy flakes turn regular concrete into beautiful, tough flooring that looks good and works well. Understanding the differences between coating types like epoxy, polyaspartic, and polyurea helps you pick the right system for your specific space.
The key is matching the base coat to your conditions (indoors vs outdoors, temperature, sun exposure) and using a quality polyaspartic top coat for maximum protection and long life. These business-grade systems bring professional strength to homes and businesses alike.
Whether you do it yourself or hire professionals, epoxy floor flakes give you long-lasting value through better looks, safety, and performance. With proper installation using the right coating combination and simple care, an epoxy floor with flakes becomes a practical and attractive solution that improves any space for many years.